In This Article
Ever walked past a neighbour’s backyard and caught that intoxicating aroma of slow-smoked brisket wafting through the air? You probably thought, “I’d love to do that, but isn’t smoking meat incredibly complicated?” Here’s the truth that’ll surprise you: choosing an electric smoker for beginners transforms what seems like a intimidating culinary art into something as simple as setting your oven timer.
I remember my first attempt at smoking meat with a traditional charcoal setup. Between babysitting temperatures, adding wood chips every hour, and waking up at 4 AM to maintain the fire, I nearly gave up on BBQ altogether. Then I discovered electric smokers, and everything changed. No more playing weatherman with wind conditions, no propane tank anxiety, and certainly no sleepless nights monitoring temperatures.
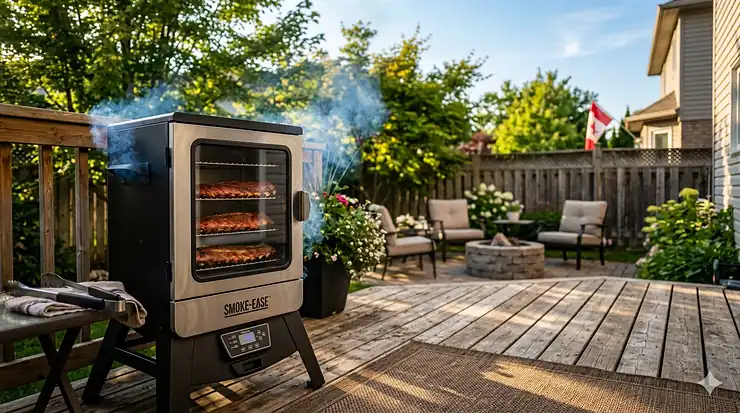
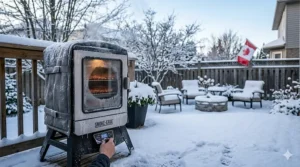
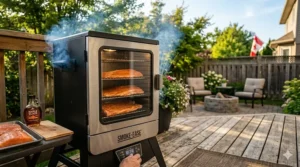
For Canadian home cooks, electric smokers offer a particular advantage. Whether you’re dealing with Winnipeg’s bitter winters or Vancouver’s unpredictable rain, these plug and play smokers maintain consistent temperatures without the drama of outdoor fires. They’re genuinely apartment friendly, produce minimal mess, and require zero experience to produce restaurant-quality results. If you’ve been putting off smoking because it seemed too technical, this guide will show you exactly why an easy to use electric smoker might be the best cooking investment you’ll make in 2026.
Quick Comparison Table: Top Electric Smokers at a Glance
| Model | Cooking Space | Temperature Range | Key Feature | Price Range (CAD) | Best For |
|---|---|---|---|---|---|
| Masterbuilt MB20071117 | 710 sq in | 100-275°F | Side chip loader | $340-$390 | Budget-conscious beginners |
| Bradley BS611 | 520 sq in | Up to 280°F | Bisquette auto-feeder | $580-$650 | Set and forget operation |
| EAST OAK 30″ | 725 sq in | 100-275°F | Glass viewing window | $380-$450 | Visual learners |
| Masterbuilt MB20070421 | 730 sq in | 100-275°F | Built-in window & legs | $420-$480 | All-in-one convenience |
| Char-Broil Analog | 544 sq in | Analog dial | Budget-friendly | $180-$240 | Tight budgets |
| Smokin-It Model 1 | 22 lbs capacity | 100-250°F | Restaurant-grade steel | $680-$780 | Durability seekers |
| Cuisinart COS-330 | 548 sq in | Analog control | Three adjustable racks | $220-$280 | Casual weekend smokers |
✨ Just one click – help others make better buying decisions too!😊
Top 7 Electric Smoker for Beginners: Expert Analysis
1. Masterbuilt MB20071117 30″ Digital Electric Smoker
When someone asks me for the best electric smoker for beginners, this is where the conversation starts. The Masterbuilt MB20071117 has essentially become the default recommendation in Canadian smoking communities, and there’s genuine reason behind that popularity.
Key Specifications:
- 710 square inches of cooking space (4 chrome-coated racks)
- Digital temperature control (100-275°F)
- 1,500-watt heating element
- Patented side wood chip loader
Price: $340-$390 CAD on Amazon.ca
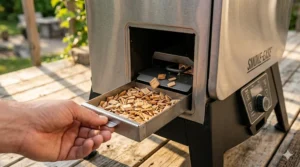
What makes this an easy to use electric smoker is that side-loading chip system. You’re not opening the door and hemorrhaging heat every time you need more smoke flavour—just slide out the chip tray, refill, and you’re done in 30 seconds. I’ve used this exact feature during a Saskatchewan winter smoking session, and maintaining 225°F while it was -15°C outside would’ve been impossible with a door-opening system.
Canadian buyers consistently praise the straightforward digital controls. There’s no learning curve with complicated menus or smartphone apps you don’t need. Set your temperature, set your timer, walk away. That’s the entire process.
✅ Pros:
- Side chip loader eliminates heat loss
- Digital controls with clear display
- Large cooking capacity for families
- Excellent insulation for Canadian winters
❌ Cons:
- Wood chip tray could hold more volume
- Some units arrive with minor cosmetic damage during shipping
Who This Is For: Anyone wanting a no propane required smoker that delivers consistent results without requiring constant attention.
2. Bradley Smoker BS611 4-Rack Digital
The Bradley BS611 represents a different approach to electric smoking, and it’s particularly brilliant for the set and forget smoker crowd. Based out of Canada, Bradley designed this with our climate and cooking style in mind.
Key Specifications:
- 520 square inches of cooking space
- Automatic bisquette feeding system
- Fully insulated cabinet
- Separate smoke generator
Price: $580-$650 CAD on Amazon.ca
Here’s what separates Bradley from everything else: their proprietary wood bisquettes automatically feed into the smoker every 20 minutes for up to 9 hours. You’re literally loading wood once and forgetting about it for your entire cook. The bisquettes produce cleaner, more consistent smoke than loose chips because they’re compressed and burn uniformly.
The trade-off? You’re locked into buying Bradley’s bisquettes, which cost more than regular wood chips. But Canadian customers report the convenience factor completely justifies the premium. One reviewer mentioned smoking an overnight brisket and actually sleeping through the night—something unthinkable with traditional smokers.
✅ Pros:
- Fully automatic wood feeding (9-hour capacity)
- Cleaner smoke flavour than chip-based systems
- Canadian company with excellent support
- Superior insulation for temperature stability
❌ Cons:
- Proprietary bisquettes are more expensive
- Smaller cooking capacity than competitors
- Cannot use regular wood chips
Who This Is For: Someone who values convenience above all else and wants genuinely hands-off smoking experiences.
3. EAST OAK 30″ Digital Electric Smoker
The EAST OAK 30″ is what happens when a newer company studies every complaint about existing smokers and builds something addressing those exact issues. This represents tremendous value for Canadian beginners.
Key Specifications:
- 725 square inches of cooking space
- Triple-layer insulation
- Large glass viewing window
- Built-in meat probe
Price: $380-$450 CAD on Amazon.ca
That viewing window changes everything. Instead of opening the door to check your meat (and losing heat), you can watch your food develop that beautiful bark without interrupting the cooking process. The built-in meat probe connects directly to the digital display, so you’re monitoring internal temperatures in real-time.
Canadian buyers particularly appreciate the triple-layer insulation. Ontario winters and Alberta chinooks create wild temperature swings, but the EAST OAK holds steady. One Toronto-based reviewer mentioned maintaining 225°F during a snowstorm without the smoker working overtime.
The side chip loader holds more volume than the Masterbuilt, giving you longer smoke times between refills. For a 12-hour pork shoulder, you might only need to reload chips 3-4 times instead of 6-7.
✅ Pros:
- Large viewing window for monitoring without heat loss
- Superior insulation (three layers)
- Built-in meat probe included
- Higher chip capacity than competitors
❌ Cons:
- Lesser-known brand with fewer reviews
- Some quality control inconsistencies reported
- Customer service response times vary
Who This Is For: Beginners who want to watch and learn the smoking process while maintaining convenience.
4. Masterbuilt MB20070421 30″ Digital Electric Smoker with Window and Legs
The Masterbuilt MB20070421 takes their classic model and adds the two features most requested by Canadian buyers: a viewing window and elevated legs. It’s the all-in-one solution that eliminates accessory purchases.
Key Specifications:
- 730 square inches of cooking space
- Large front-mounted viewing window
- Integrated leg stand with wheels
- Four chrome-coated racks
Price: $420-$480 CAD on Amazon.ca
Those legs matter more than you’d think. Without them, you’re bending down constantly to check temperatures and add chips. With them, everything’s at a comfortable working height. The rear wheels make moving the smoker around your patio effortless—crucial when you’re storing it in a garage between uses.
The viewing window uses a larger glass panel than the EAST OAK, and the combination of window plus elevated height means you can monitor your cook while standing comfortably. Manitoba buyers mention this being perfect for longer smokes when you don’t want to constantly squat down.
This is essentially the MB20071117 evolved into its final form. Everything that worked well gets kept, everything people complained about gets fixed. The price premium of $80-90 CAD over the basic model delivers genuine value.
✅ Pros:
- Elevated design eliminates constant bending
- Large window for easy monitoring
- Rear wheels for mobility
- All-in-one package (no accessories needed)
❌ Cons:
- Higher price than basic models
- Takes up more vertical space
- Heavier unit to move when stored
Who This Is For: Canadians wanting a complete, premium beginner setup without buying separate leg kits and accessories.
5. Char-Broil Analog Electric Smoker
Sometimes you don’t need digital precision—you just need affordable smoking that works. The Char-Broil Analog delivers exactly that without apologizing for its simplicity.
Key Specifications:
- 544 square inches of cooking space
- Analog temperature dial
- 1,200-watt heating element
- Water and wood chip trays included
Price: $180-$240 CAD on Amazon.ca
This represents the lowest entry point for electric smoking in Canada. You’re sacrificing digital controls and precise temperature settings, but gaining something valuable: simplicity. There’s one dial for temperature, one water tray for moisture, one wood chip tray for smoke. That’s it.
Canadian reviewers describe this as the apartment friendly smoker Canada option par excellence. It’s compact, doesn’t require elaborate setup, and produces respectable results for someone just experimenting with smoking. One Vancouver buyer mentioned using this on their apartment balcony for two years before upgrading.
The analog control means you’ll develop better instincts for temperature management. You’re not punching numbers into a screen—you’re learning what “medium-low” looks like and how your specific unit behaves. That hands-on knowledge transfers beautifully if you eventually upgrade to more sophisticated equipment.
✅ Pros:
- Extremely budget-friendly entry point
- Simple operation (no digital complexity)
- Compact size for small spaces
- Forces you to learn smoking fundamentals
❌ Cons:
- Less precise temperature control
- Smaller cooking capacity
- Basic insulation (struggles in extreme cold)
Who This Is For: Budget-conscious Canadians wanting to try smoking without significant financial commitment.
6. Smokin-It Model 1 Electric Smoker
The Smokin-It Model 1 occupies a unique position: it’s the electric smoker built like a commercial kitchen would demand. If durability matters more than bells and whistles, this American-made unit deserves serious consideration.
Key Specifications:
- 22 pounds meat capacity (approximately)
- All stainless steel construction (18-gauge, 201 grade)
- 100-250°F temperature range
- NSF certified for restaurant use
Price: $680-$780 CAD (varies by Canadian dealer)
This isn’t digital. There’s no smartphone app. The temperature dial is analog, the construction is industrial, and the warranty reflects confidence in longevity. Canadian buyers report these units lasting 10+ years with zero maintenance beyond cleaning.
The stainless steel construction matters enormously for Canadian climates. This won’t rust from coastal salt air in Nova Scotia or corrode from road salt spray in Ontario. The fiberglass insulation maintains temperatures efficiently even when Edmonton hits -30°C.
At 22 pounds meat capacity, you’re fitting substantial quantities. The dimensions favour vertical stacking rather than wide racks, making it perfect for sausages, salmon, and hanging preparations.
✅ Pros:
- Restaurant-grade stainless steel construction
- Exceptional durability (10+ year lifespan)
- Superior insulation for Canadian winters
- Simple, foolproof operation
❌ Cons:
- Higher initial investment
- Analog controls only
- Must open door to add chips
- Limited availability in Canada
Who This Is For: Serious hobbyists valuing long-term durability over digital convenience.
7. Cuisinart COS-330 Electric Smoker
Cuisinart brings their kitchen appliance expertise to outdoor smoking with the COS-330, and the result feels reassuringly familiar for beginners intimidated by BBQ culture.
Key Specifications:
- 548 square inches of cooking space
- Three adjustable racks
- 1,500-watt heating element
- Water and wood chip trays
Price: $220-$280 CAD on Amazon.ca
This feels more like operating a kitchen appliance than traditional smoking equipment, which is precisely the point. The analog controls resemble your oven dial, the setup process is straightforward, and the cooking results are consistently solid if unspectacular.
Canadian buyers describe this as the weekend warrior option. You’re not competing in BBQ competitions or smoking whole hogs—you’re making ribs for Sunday dinner and pulled pork for sandwiches. The Cuisinart handles those tasks admirably without requiring you to become a pitmaster.
The three adjustable racks offer flexibility for different foods. Smoke salmon on the top rack while doing chicken thighs on the bottom. The water tray is larger than budget competitors, maintaining moisture effectively during longer cooks.
✅ Pros:
- Familiar brand with reliable support
- Simple analog operation
- Good build quality for price point
- Adjustable rack system
❌ Cons:
- No window or viewing port
- Basic temperature control
- Insulation adequate but not exceptional
- Door seal could be tighter
Who This Is For: Casual Canadian smokers wanting reliable weekend results without complexity.
Understanding Electric Smokers: The Beginner’s Foundation
Before you invest in an electric smoker for beginners, let’s demystify how these devices actually work. Unlike their charcoal and propane cousins that require constant fire management, electric smokers operate on a beautifully simple principle: consistent heat plus controlled smoke equals perfectly cooked meat.
How Electric Smokers Work
At the base of every electric smoker sits a heating element—essentially the same technology powering your kitchen oven. This element heats a small tray or pan where you place wood chips. As the chips smolder (not burn), they release smoke that flavours your food while the heating element maintains your target temperature.
According to Wikipedia’s comprehensive overview of smoking techniques, hot smoking—which is what electric smokers excel at—combines cooking and flavouring simultaneously. The temperature range of 100-275°F (38-135°C) cooks your food while infusing it with smoke, creating that distinctive BBQ flavour and texture we all crave.
The genius of this design is temperature consistency. Charcoal smokers fluctuate wildly based on airflow, weather, and coal quality. Propane requires constant monitoring and adjustment. Electric smokers? Set your temperature digitally, and a thermostat maintains it within 5-10 degrees throughout your entire cook.
The Canadian Advantage: Why Electric Makes Sense Here
Canadian weather presents unique challenges for outdoor cooking. I’ve watched friends struggle through Alberta chinooks where temperatures swing 20°C in an hour. I’ve seen Vancouver rain extinguish charcoal fires mid-cook. Montreal winters make propane regulation nearly impossible.
Electric smokers eliminate weather as a variable. That heating element doesn’t care about wind chill or humidity. Your insulated cabinet maintains temperature whether it’s July in Kelowna or January in Yellowknife. This reliability transforms smoking from a fair-weather hobby into a year-round cooking method.
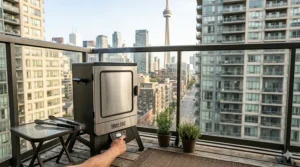
For apartment dwellers across Canadian cities, electric smokers solve the balcony problem. Most condo boards prohibit charcoal and propane due to fire risk, but electric units typically pass inspection. You’re plugging into a standard 120V outlet—the same as a space heater or electric grill.
Essential Features Every Beginner Should Consider
Choosing your first electric smoker for beginners feels overwhelming when manufacturers flood you with specifications and features. Let me cut through the marketing noise and focus on what actually matters for Canadian newcomers.
Temperature Control: Digital vs Analog
Digital controls provide precision, allowing you to set exact temperatures and timers. You want 225°F for 6 hours? Punch in those numbers and walk away. This precision matters enormously when following recipes that specify exact temperatures.
Analog controls use a dial without specific temperature markings. You’re adjusting to “low,” “medium,” or “high” based on experience and thermometer readings. This requires more attention but costs significantly less.
For beginners, digital wins decisively. You’re already learning meat selection, wood pairing, and timing. Removing temperature guesswork from that equation accelerates your progress dramatically.
Cooking Capacity: Matching Size to Reality
Manufacturers list cooking space in square inches, which means absolutely nothing to most people. Here’s the translation:
- 500-600 sq in: 3-4 racks of ribs, or 4-5 chickens, or 1 medium brisket
- 700-800 sq in: 4-5 racks of ribs, or 6 chickens, or 1 large brisket plus sides
- 900+ sq in: Everything above plus smoking multiple items simultaneously
For most Canadian families, the 700-800 square inch range provides ideal flexibility. You can smoke enough for immediate consumption plus leftovers without the unit dominating your patio.
Insulation Quality: The Canadian Winter Factor
Insulation determines how efficiently your smoker maintains temperature in harsh conditions. Single-wall models struggle when ambient temperatures drop below 0°C. Double-wall insulation performs admirably. Triple-wall insulation (like the EAST OAK) maintains temperatures effortlessly even in extreme cold.
Health Canada’s food safety guidelines specify exact internal temperatures for food safety—71°C (160°F) for ground meats, 74°C (165°F) for poultry. Your smoker must maintain cooking temperatures reliably to reach these targets, making insulation quality a genuine safety consideration.
Wood Chip Loading Systems
This feature separates frustrating experiences from enjoyable ones. Traditional top-loading systems require opening the main door to add chips, releasing heat and smoke. You’re essentially restarting your temperature climb every time.
Side-loading systems like Masterbuilt’s patented design let you add chips through an external access point. The cooking chamber stays sealed, temperatures remain stable, and you’re not flooding your food with oxygen that creates bitter smoke.
Bradley’s automatic bisquette feeder represents the ultimate convenience: load once, forget for hours. The trade-off is proprietary fuel costs, but for set and forget smoker enthusiasts, that convenience justifies the expense.
The Electric Smoker Startup Guide: First Cook Success
You’ve unpacked your new smoker, and now what? This electric smoker startup guide ensures your first cooking session succeeds, building confidence for everything that follows.
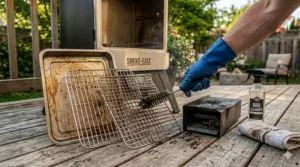
Seasoning Your Smoker: The Critical First Step
Never skip seasoning. New smokers contain manufacturing residues, protective coatings, and metal dust that you absolutely don’t want flavouring your food. Seasoning creates a protective layer while burning off these contaminants.
The Seasoning Process:
- Coat all interior surfaces (racks, walls, water pan) with high-smoke-point cooking oil (canola, vegetable, grapeseed)
- Fill the water pan halfway
- Load wood chips (hickory or oak work well)
- Set temperature to 275°F (135°C)
- Run for 2-3 hours, adding chips every 45 minutes
- Let cool completely, then wipe down with paper towels
You’ll notice the smoke looks white initially, gradually shifting to thin blue smoke. That white smoke carries the manufacturing residue. Once you’re seeing consistently blue smoke, the seasoning is complete.
Your First Cook: Setting Up for Success
Start simple. Chicken thighs or pork ribs offer forgiving timelines and spectacular results. Avoid brisket or pork shoulder for your debut—these marathon cooks introduce too many variables.
Step-by-Step First Cook:
- Prepare Your Meat (30 minutes before smoking)
- Remove from refrigerator
- Apply dry rub or marinade
- Let sit at room temperature (helps even cooking)
- Prepare Your Smoker
- Fill water pan 2/3 full with hot water (speeds temperature recovery)
- Load wood chips loosely in tray (don’t pack them)
- Preheat to target temperature (usually 225°F/107°C for beginners)
- Load Your Meat
- Wait until smoker reaches target temperature
- Place meat on racks with space between pieces
- Insert probe thermometer if using (highly recommended)
- The Waiting Game
- Add chips every 45-60 minutes for first 3 hours (more smoke after this creates bitter flavour)
- Resist opening the door to peek (every opening adds 15-20 minutes to cooking time)
- Monitor internal temperature, not clock time
- The Finish
- Remove when meat reaches safe internal temperature per Health Canada guidelines
- Let rest 10-15 minutes before cutting (juices redistribute)
Temperature and Timing Guidelines
These benchmarks help beginners develop instincts:
| Protein | Smoker Temp | Internal Target | Approximate Time |
|---|---|---|---|
| Chicken thighs | 225°F (107°C) | 175°F (79°C) | 2.5-3 hours |
| Pork ribs | 225°F (107°C) | 190-203°F (88-95°C) | 5-6 hours |
| Salmon fillets | 180°F (82°C) | 145°F (63°C) | 1-2 hours |
| Pork shoulder | 225°F (107°C) | 203°F (95°C) | 1.5 hours per pound |
Remember: these are estimates. Meat temperature matters infinitely more than clock watching. A probe thermometer represents your most important smoking accessory.

Wood Selection Guide: Matching Smoke to Food
Wood choice dramatically impacts flavour, and beginners often overthink this decision. Here’s the practical breakdown for Canadian cooks.
The Big Four: Versatile Woods for Everything
Hickory delivers strong, bacon-like smoke. Use with beef, pork, and game meats. It’s the default choice when you’re unsure—nearly impossible to go wrong with hickory on red meat.
Apple provides mild, slightly sweet smoke. Perfect for poultry, pork, and fish. Canadian suppliers stock apple chips readily since local orchards provide abundant wood.
Cherry creates subtle, fruity smoke with beautiful colour (gives meat a mahogany tone). Excellent for poultry and pork, particularly when you want elegant presentation.
Maple offers delicate, slightly sweet smoke. Being abundant in Eastern Canada, maple chips are affordable and widely available. Use for poultry, pork, and vegetables.
Regional Canadian Woods Worth Exploring
Alder grows prolifically in BC and provides the traditional Pacific Northwest salmon-smoking flavour. Mild and slightly sweet, it’s perfect for any seafood.
Oak from Ontario and Quebec forests delivers medium smoke intensity. It’s the workhorse wood—pairs with literally everything.
Wood Chips vs Bisquettes vs Pellets
Wood chips represent the standard for electric smokers. Soak them 30 minutes before use (reduces burning, extends smoking time). Available everywhere from Canadian Tire to Amazon.ca.
Bisquettes (Bradley proprietary) offer consistency and convenience. They’re compressed sawdust pucks that burn uniformly for exactly 20 minutes. More expensive but eliminate guesswork.
Pellets work in specialized smokers but not traditional electric models. Skip these unless your specific model documentation confirms compatibility.
Maintenance and Care: Protecting Your Investment
Proper maintenance extends your smoker’s lifespan significantly while ensuring food safety. Canadian conditions (moisture, temperature swings, road salt) demand extra attention.
After Every Cook: The Essential Routine
- While Still Warm: Remove racks and water pan. Dump ash and spent chips. Wipe interior walls with damp paper towels (grease removes easier when warm).
- Once Cooled: Wash racks and water pan in hot, soapy water. Scrub stubborn residue with non-abrasive pads.
- Exterior Care: Wipe down with damp cloth. Address any grease splatters immediately (becomes permanent if left).
- Chip Tray: Empty completely. Wood ash absorbs moisture and promotes rust.
Monthly Deep Cleaning
Every 4-5 cooks, perform a thorough cleaning:
- Remove all racks, pans, and internal components
- Mix water and vinegar (1:1 ratio) in spray bottle
- Spray all interior surfaces thoroughly
- Let sit 15 minutes
- Scrub with non-scratch pads
- Rinse with damp cloths
- Dry completely before reassembling
Never use harsh chemical cleaners. Residues affect food flavour and can create dangerous fumes when heated.
Canadian Winter Storage
If storing between seasons:
- Clean thoroughly using deep cleaning protocol
- Oil all interior surfaces lightly (prevents rust)
- Leave door slightly ajar (prevents moisture buildup)
- Cover with breathable tarp or purpose-built cover
- Store in garage or shed (not directly on ground)
Never store with water in the pan or chips in the tray. Moisture plus freezing temperatures equals rust and deterioration.
Troubleshooting Common Issues
Temperature won’t stabilize: Check door seal (damaged gaskets are common). Ensure heating element isn’t clogged with ash. Verify you’re not opening door repeatedly.
Weak smoke production: Replace old chips (they lose potency). Don’t pack chips too tightly (restricts airflow). Ensure chips make contact with heating element.
Bitter smoke flavour: Stop adding chips after 3 hours of cooking. Switch to cleaner-burning wood (avoid softwoods). Let smoker preheat fully before adding meat.
Benefits vs Traditional Smoking Methods
Why choose electric over charcoal or propane? The answer depends entirely on your priorities, but for beginners, electric advantages are substantial.
Comparison: Electric vs Traditional Methods
| Factor | Electric | Charcoal | Propane |
|---|---|---|---|
| Setup Time | 15 minutes | 45-60 minutes | 20-30 minutes |
| Temperature Stability | Excellent | Requires constant attention | Good with monitoring |
| Weather Resistance | Excellent (with insulation) | Poor (wind affects severely) | Good |
| Fuel Cost | $0.15-0.30/hour electricity | $15-20 per cook (charcoal) | $8-12 per cook (propane) |
| Attention Required | Minimal (check every 1-2 hours) | Constant | Moderate |
| Flavour Profile | Clean smoke | Authentic BBQ | Clean smoke |
| Apartment Friendly | Yes (most buildings) | No | Rarely |
| Learning Curve | Gentle | Steep | Moderate |
The Electricity Cost Reality
Canadian electricity rates vary by province, but let’s calculate real costs:
- Average electric smoker draws 1,500 watts
- Ontario’s time-of-use rates: $0.074-0.113 per kWh (2026 rates)
- 6-hour pork shoulder cook: 9 kWh used
- Cost: $0.67-1.02 CAD per cook
Compare that to $15-20 in charcoal or $8-12 in propane, plus the convenience factor. Electric delivers remarkable value for Canadian hobbyists.
The Environmental Consideration
According to research from McGill University’s Office for Science and Society, electric smokers produce fewer carcinogenic compounds than direct-fire methods when used properly. The cleaner burn and temperature control reduce formation of harmful polycyclic aromatic hydrocarbons.
Electric smokers also eliminate propane tanks (environmental disposal concern) and reduce particulate emissions compared to charcoal. For environmentally-conscious Canadians, this matters.
Safety Considerations and Food Guidelines
Food safety isn’t optional—it’s fundamental. Electric smokers make achieving safe temperatures easier, but you must still follow proper protocols.
Internal Temperature Requirements (Health Canada Standards)
Health Canada provides explicit temperature targets. Never trust appearance or “doneness tests” over thermometer readings:
- Ground meats (beef, pork, lamb): 71°C (160°F)
- Poultry (chicken, turkey, duck): 74°C (165°F)
- Whole poultry: 82°C (180°F)
- Fish and seafood: 70°C (158°F)
- Leftovers when reheating: 74°C (165°F)
Use a reliable probe thermometer. Insert into the thickest part of meat, avoiding bones (bone conducts heat and gives false readings). For poultry, check both breast and thigh—thigh takes longer but requires same final temperature.
The Danger Zone: Time and Temperature
Bacteria multiply rapidly between 4°C and 60°C (40°F-140°F). Never leave meat in this danger zone for more than 2 hours total time—including thawing, preparation, and resting periods.
When smoking:
- Bring meat to room temperature quickly (30 minutes maximum)
- Get smoker to temperature before loading meat
- Don’t let cooked meat sit in smoker after reaching target temperature
- Refrigerate leftovers within 2 hours of removing from heat
Electrical Safety Protocols
Electric smokers present standard appliance risks:
- Use GFCI-protected outlets (required by Canadian electrical code for outdoor receptacles)
- Keep cord away from water (rain, snow, ice buildup)
- Never use extension cords (fire hazard—smokers draw significant current)
- Unplug when not in use (prevents accidental activation)
- Inspect cord regularly (damage from cold causes shorts)
Smoke Management
While electric smokers produce less smoke than charcoal, they still generate noticeable amounts. Canadian building codes vary, but generally:
- Position at least 10 feet (3 metres) from buildings
- Ensure adequate ventilation
- Be considerate of neighbours (smoke carries)
- Never operate indoors or in enclosed spaces (carbon monoxide risk)
Frequently Asked Questions
❓ Can electric smokers be used in Canadian winters?
❓ What's the average electricity cost for smoking in Canada?
❓ Are electric smokers allowed on apartment balconies in Canada?
❓ How long do wood chips last in an electric smoker?
❓ What's the difference between electric smokers and pellet grills?
Conclusion: Your Path to Smoking Success
Choosing an electric smoker for beginners shouldn’t feel overwhelming. You now understand the key features, know which models excel for Canadian conditions, and have the knowledge to produce consistently excellent results.
Start with your budget and space constraints. The Masterbuilt MB20071117 at $340-390 CAD provides exceptional value for most Canadian newcomers—digital precision, side chip loading, and proven reliability. If convenience matters more than cost, the Bradley BS611 eliminates almost all manual intervention with its automatic bisquette feeding system.
Remember that expensive equipment doesn’t create great BBQ—knowledge and patience do. Your $350 electric smoker can produce ribs that rival $2,000 pellet grills when you understand temperature control, wood selection, and timing. This guide gives you that foundation.
The beauty of an easy to use electric smoker is how it compresses the learning curve. You’re not fighting fire management or weather conditions—you’re focused purely on the food. That accelerates skill development dramatically.
Every Canadian pitmaster started somewhere. Most started with an electric smoker, learned the fundamentals, and either stuck with electric for its convenience or graduated to more complex methods with a solid foundation. Either path leads to incredible food and satisfied dinner guests.
Your backyard BBQ journey begins with a single decision. Choose the electric smoker for beginners that matches your budget and needs, follow this electric smoker startup guide for your first cook, and discover why smoking has captivated home cooks for thousands of years. The smell of hickory-smoked ribs wafting through your neighbourhood starts now.
Recommended for You
- 7 Best Masterbuilt Digital Electric Smoker Canada 2026
- 7 Best Pellet Smoker for Canadian Winter 2026: -30°C Tested
- 7 Best WiFi Pellet Smoker Canada 2026
Disclaimer: This article contains affiliate links to Amazon.ca. If you purchase products through these links, we may earn a small commission at no additional cost to you.
✨ Found this helpful? Share it with your friends! 💬🤗